For all of you who received Cheerson CX-10 mini-quadcopters as holiday gifts and are learning to fly, bookmark this page because you’ll need it soon. Here’s a list of some common repairs – you might as well learn about it now.
FYI – The Cheerson CX-10 is also sometimes sold as the Cheerson Q4. This repair guide also largely applies to the similar Cheerson CX-10A and Cheerson CX-10C models.
Also just for reference, here is the manual for the Cheerson CX-10.
0.05 Ounces of Prevention
If you received this as a gift:
 |
Cheerson CX-10 |
and it didn’t come with a prop guard (which weighs 0.05 ounces / 1.5g), then you should definitely get one. It will dramatically reduce the number of broken propellers you have to deal with, particularly while you are first learning.
 |
Blade Guard and 16 replacement propellers for Cheerson CX-10 |
 |
2 blade guards for the Cheerson CX-10 |
Replacing the propellers on your CX-10
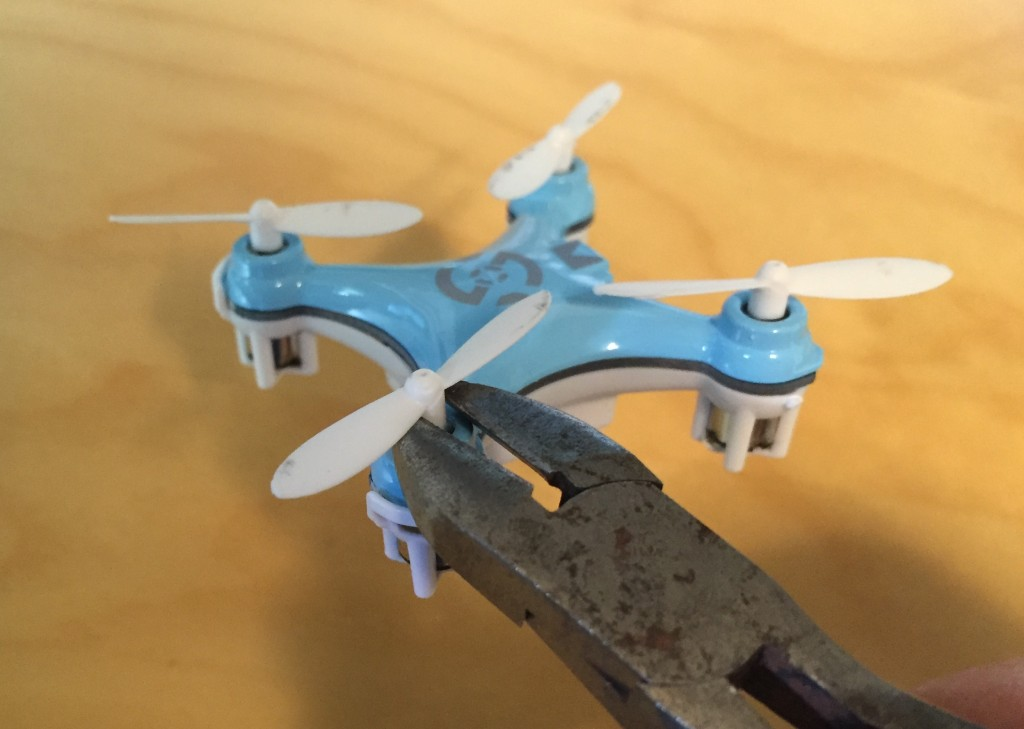
Removing the propellers: The propellers can be removed from the motor shaft by pulling them straight upwards. Sometimes they are loose, but sometimes it can take a little force. A pair of wirecutters gently put around the prop can help pry off the more stubborn ones. Just take care not to bend the motor shaft or nick it.
Proper Propeller Placement: You will need to remove the propellers when they break, but even more often something will get tangled in them (in my house, that tends to be hair or carpet fuzz). Removing the propeller makes it easy to remove the offending tangle.

The key thing to remember is that when you put the propellers back, you need to match the direction of rotation with the propeller. There are two types of propellers- some of them rotate clockwise, and some rotate counterclockwise. There is actually a letter code marking the propellers, but it’s easy enough to just remember the direction of rotation of the motor, and make sure that when the propeller rotates it should be pulling the quadcopter upwards.
Shorted out motor wires
This is a common issue. On one of my quadcopters, the motor wiring was worn and exposed on all four motors. This is what it looks like:

The problem is that the wiring will sometimes short against the metal body of the motor.
In my case, the quadcopter would still turn on and pair with the controller, but then once you tried to fly it the motors would spin for a half-second and then stop. The LEDs would then start blinking like it need to be charged again (even though it had just been charged).
On another quadcopter, it would fly for a few seconds, and then fall out of the sky. Amusing, but frustrating.
Here is the fix:
- Remove the propellers
- Unscrew the four screw in the bottom.
- Gently pry off the the bottom white enclosure (note the clips on each end of the PCB)
- Take off the blue case
You should end up with something that looks like this:


5. Fixing the insulation on the worn motors is tricky because it might make it too thick to slide the motor back into the case. In one case, I just removed the motor and remounted it so that the exposed part is away from the motor body. In another case I used tweezers to put in a place a very small piece of black electrical tape to insulate the wire.
6. Put everything back together (be careful when replacing the propellers!)


